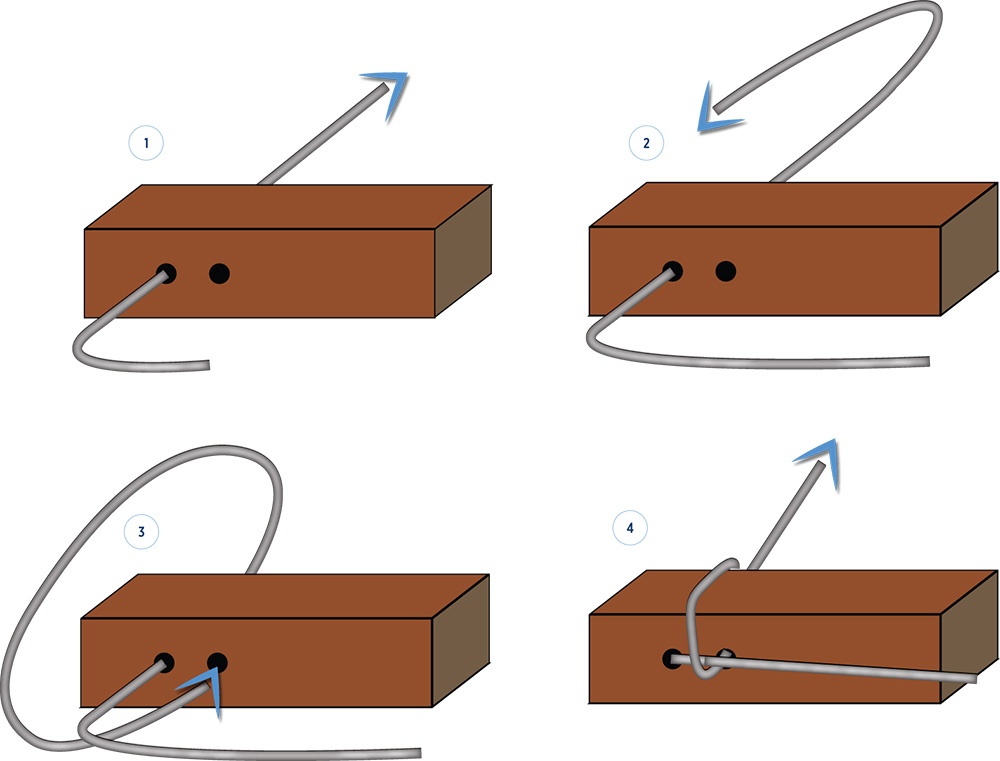
- Starting with the G string, hold one end of the string at the end of the bridge.
- Thread the other end in the left hole of the bridge.
- Circle around the top of the bridge and go UNDER the string.
- Thread the end of the string in the hole on the right side. Again, making sure to go UNDER the string.
- Pull the string tight and wind on the tuning machine and tune to pitch.
- Continue the process for all 4 strings making sure to loop around all string ends creating a tight clean bundle.
Note: IF you prefer the standard string tie style, that is possible by simply using the holes on the right side of each two-hole set on the bridge.
The Quick-Tie Bridge with 8 holes on Lanikai 4 string ukuleles has several benefits.
-
It saves time in string changes
-
Reduces string stretching
-
Has a clean look
-
Allows for traditional tie if preferred
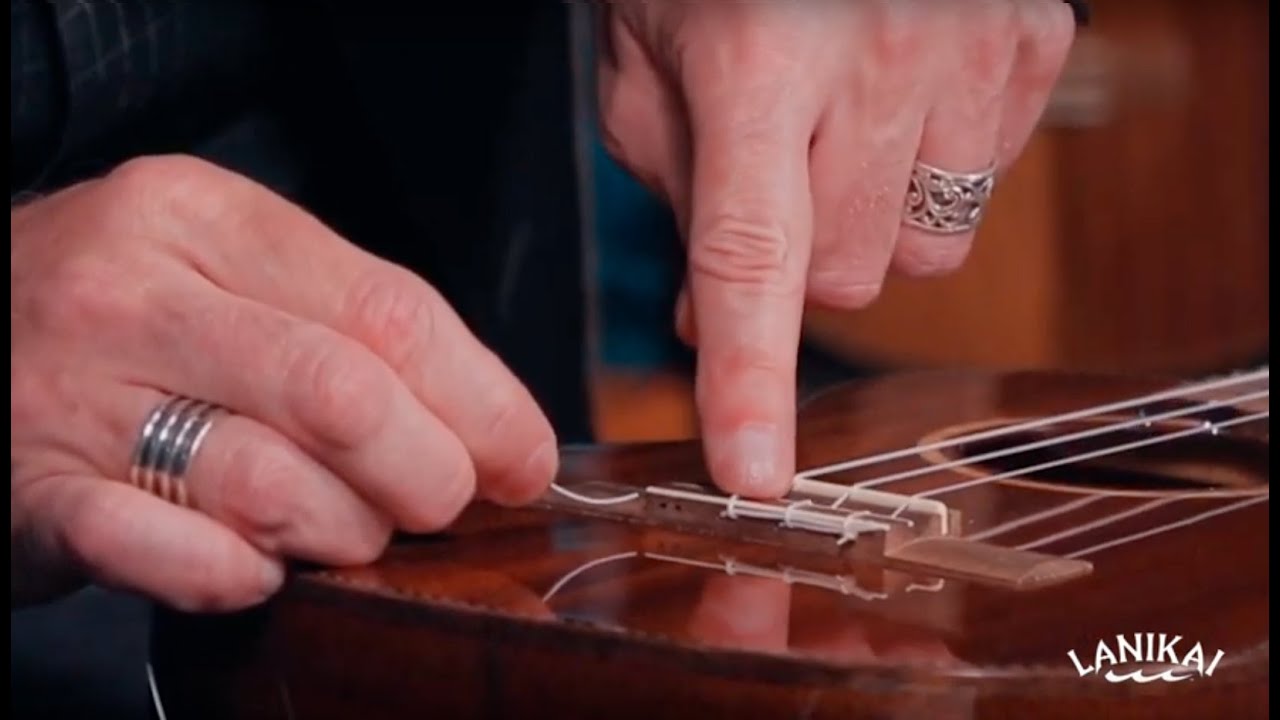
Watch below as Lanikai Brand Manager Rock Clouser demonstrates how to change strings on the Lanikai Quick-Tie Bridge.
If you have played ukulele for a while or are new to the instrument, you should be aware that since ukulele strings are nylon, it takes a while for them to stretch out and stay in tune. It is important with new strings that you stretch them, retune, stretch, retune, etc. several times in the first few days. Eventually, they will settle in and stay relatively close to pitch with just minor adjustments needed to be in tune. It is a good idea to use either the built-in tuner or an external tuner to make sure the ukulele is standard pitch and not tuned too low or too high.
We hope this tutorial helps with string changes and gives you more time to play and enjoy your ukulele!